

Table of Contents
Night photography often means shooting in low light, where slower shutter speeds can easily lead to camera shake and blurry images. A stable tripod helps keep your camera steady, so you can capture sharp photos of cityscapes, architecture, and night landscapes.
In this guide, we'll cover what to look for in a night photography tripod, compare three NEEWER options, and share practical tips for getting better results.
Why Do You Need a Tripod for Night Photography?
When shooting at night, your camera has less available light to work with. You may need to use a slower shutter speed, a wider aperture, or a higher ISO to get a properly exposed image. Each approach comes with trade-offs, and a tripod can help you manage them.
Reduce Camera Shake in Low Light
When light levels drop, your camera may need a longer exposure to capture enough detail. Even slight hand movements can cause motion blur, especially when using slower shutter speeds.
A tripod provides a stable base for your camera, reducing movement during exposure. This is particularly useful when photographing buildings, city streets, or nighttime landscapes where you want details to remain sharp.
Capture Sharp Photos with Slower Shutter Speeds
A tripod allows you to use slower shutter speeds without relying on handheld stability. This gives you more flexibility when photographing dimly lit scenes.
For example, you can capture light trails from passing cars, reflections on the water, or illuminated cityscapes with longer exposures. You can also keep ISO lower when the scene and exposure time allow, helping reduce image noise.

What to Look for in a Night Photography Tripod
Not every tripod is equally suited to nighttime shooting. The right choice depends on where you shoot, what camera gear you use, and how much flexibility you need.
Here are a few things to consider when choosing a tripod for night photography.
Stability and Load Capacity
Stability is one of the most important factors when choosing a night photography tripod. The tripod should comfortably support your camera and lens combination without feeling unsteady.
Check the maximum load capacity, but don't rely on that number alone. Leg construction, locking mechanisms, tripod head design, and how securely the camera is mounted all affect stability.
If you use a heavier camera body or telephoto lens, choose a tripod with enough capacity to support your entire setup.
Height and Shooting Flexibility
A tripod with adjustable leg angles and a versatile center column gives you more options when composing nighttime shots.
For example, shooting a city skyline may call for a taller setup, while photographing reflections, foreground details, or interesting ground-level perspectives may require a much lower camera position.
Consider both the maximum height and minimum shooting height, as well as whether the center column can be reversed or adjusted.
Weight and Portability
If you often walk to your shooting location, tripod weight and folded size matter. A compact carbon fiber tripod can be easier to carry on outdoor night photography trips, especially when you're also bringing a camera, lenses, and other accessories.
Aluminum tripods can be a more affordable option for everyday use, although they may be heavier than comparable carbon fiber models.
Think about how far you'll need to carry your gear and whether portability or a more budget-friendly price matters more to you.
Leg Locks and Feet
Leg locks should be easy to operate and secure enough to keep the tripod legs firmly in position. This is especially important when setting up in low light, where you may have limited visibility.
Also consider the tripod feet. Rubber feet work well on many hard surfaces, while removable spikes can provide a better grip on softer or uneven outdoor terrain.
Best NEEWER Tripods for Night Photography
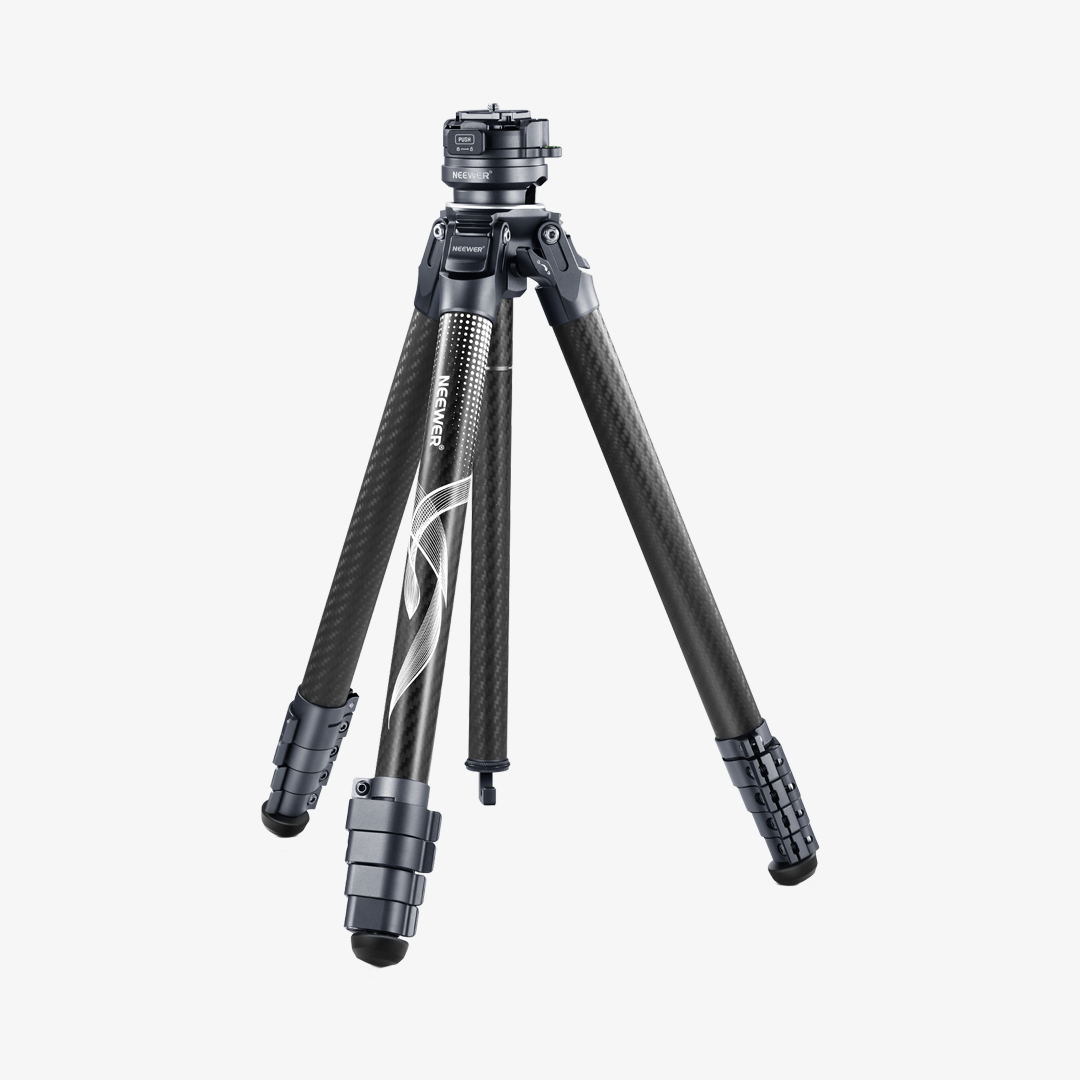
Whether you're just getting started or regularly head out for nighttime landscape photography, the right tripod depends on your budget and shooting style. Here are three NEEWER options worth considering.
NEEWER Tripod Comparison
|
Specification |
TP12 |
LT32 |
LT38 |
|
Material |
Aluminum alloy & plastic |
Carbon fiber |
Carbon fiber |
|
Weight |
2.9lb / 1.33kg |
2.6lb / 1.18kg |
3.15lb / 1.43kg |
|
Maximum Load |
11lb / 5kg |
22lb / 10kg* |
22lb / 10kg |
|
Maximum Height |
66.5" / 169cm |
62" / 157cm |
61" / 155cm |
|
Tripod Head |
Low-profile panoramic ball head |
Quick leveling ball head |
Low-profile ball head |
*The LT32 supports up to 22lb (10kg) as a tripod, but its included ball head has a maximum load capacity of 10lb (4.5kg).
Best Budget Tripod for Night Photography
The NEEWER TP12 is an affordable entry-level travel tripod for photographers who want reliable camera support without spending too much. Made from aluminum alloy and plastic, it supports up to 11lb (5kg) while weighing 2.9lb (1.33kg), making it a practical option for everyday photography and occasional outdoor trips.
Its adjustable center column extends to 66.5" (169cm) and can be inverted for low-angle and macro photography. The detachable low-profile panoramic ball head also supports 360° panning and 90° vertical shooting, giving you more flexibility when composing cityscapes and nighttime scenes.

Pros:
- Affordable for beginner night photographers.
- Flexible angles for cityscapes and architecture.
- Easy to set up for everyday night shooting.
Best Lightweight Tripod for Night Photography
The NEEWER LT32 is a compact carbon fiber travel tripod designed for photographers who frequently shoot outdoors. Weighing just 2.6lb (1.18kg), it supports up to 22lb (10kg) and folds down to 17" (43cm), making it easy to carry on night landscape and nature photography trips.
One of its standout features is the detachable quick leveling ball head, which allows ±15° adjustment to help level your camera on uneven ground. Combined with a reversible center column, adjustable leg angles, and removable rubber feet for installing spikes, the LT32 offers flexibility across different outdoor shooting environments.

Pros:
- Lightweight for outdoor and night landscape photography.
- Quick leveling on uneven terrain.
- Better grip on rocky, sandy, and muddy ground.
Best Versatile Carbon Fiber Tripod for Night Photography
The NEEWER LT38 is a carbon fiber travel tripod that balances portability with a sturdy camera support system. It weighs 3.15lb (1.43kg) and supports up to 22lb (10kg), making it suitable for a range of DSLR and mirrorless camera setups. Its compact folded design also makes it convenient to carry for outdoor and travel photography.
Unlike the LT32, the LT38 features a detachable 40mm low-center-of-gravity ball head with a 10kg load capacity. Its five-section legs extend up to 61" (155cm), while the convertible center column allows low-angle shooting down to 5.9" (15cm). This makes it a versatile option for photographers who want flexible camera positioning.

Pros:
- Stable support for larger camera and lens setups.
- Low-angle shooting for creative night compositions.
- Flexible positioning for cityscapes and architecture.
How to Use a Tripod for Night Photography
Choosing a suitable tripod is only part of getting sharp nighttime photos. How you position and use it also matters.
Choose a Stable Shooting Location
Look for firm, level ground whenever possible. Avoid loose gravel, soft mud, or surfaces that may shift during exposure.
If you're shooting outdoors on uneven terrain, adjust the leg lengths and angles to keep the tripod balanced. Make sure all feet are firmly planted before mounting your camera.
Set Up Your Tripod Properly
Extend the thicker leg sections first when possible, and make sure every leg lock is securely fastened. Spread the legs evenly and avoid extending the center column higher than necessary, as doing so can make the setup less stable.
Once your camera is mounted, check that the tripod head and quick release plate are locked securely. If your tripod has a center-column hook, you can use it to hang a suitable weight when additional stability is needed. Be careful not to let the weight swing in the wind.
Use a Remote Shutter Release or Timer
Even with a tripod, pressing the shutter button can introduce small vibrations. A remote shutter release lets you take photos without touching the camera.
If you don't have one, use your camera's built-in self-timer. A two-second delay is often enough to let vibrations settle before the exposure begins.
Night Photography Tips for Different Scenes
Different nighttime scenes call for different camera settings and shooting approaches. Here are a few tips to help you get started.
City Night Photography and Architecture
When photographing illuminated buildings and city skylines, look for interesting perspectives and compositions. Reflections in windows, streets, and water can add depth to your images.
Use a tripod to keep your framing consistent and experiment with slower shutter speeds to capture building details and ambient light. If you're photographing a brightly lit scene, check your highlights to avoid losing detail in illuminated signs and buildings.
Light Trails and Moving Traffic
Light trails are a popular subject for night photography. To capture them, set up your tripod near a road or intersection where you can safely photograph passing vehicles.
Start with a slower shutter speed and adjust it depending on traffic speed and the length of the trails you want. Keep ISO low when possible, and use a smaller aperture if you need to control the amount of light entering the camera.
A stable tripod is especially important here because the stationary parts of the scene, such as buildings and road signs, should remain sharp while the moving lights create streaks.
Night Landscapes
Night landscapes often involve shooting in locations away from city lights, where the surroundings may be dark and the terrain uneven.
A lightweight tripod is useful when hiking to a shooting location, while adjustable leg angles and removable spikes can help you position the camera on different surfaces. Look for foreground elements such as trees, rocks, or water to give your composition more depth.
Take time to check your framing and focus before shooting. In very dark conditions, autofocus may struggle, so manual focus and magnified live view can help you focus more accurately.
FAQs
Can I Use a Travel Tripod for Night Photography?
Yes. A travel tripod can work well for night photography as long as it provides enough stability and supports your camera and lens setup. Look for secure leg locks, a reliable tripod head, and a suitable load capacity. Carbon fiber travel tripods are particularly useful when you need to carry your gear over longer distances.
What Shutter Speed Should I Use with a Tripod at Night?
It depends on the scene and the effect you want. You might use a few seconds for city lights, longer exposures for light trails, or different exposure times for nighttime landscapes. Start with a slower shutter speed, check the exposure and sharpness, and adjust as needed.
How can I Keep a Tripod Stable at Night?
Set up on firm ground, spread the legs evenly, secure all leg locks, and keep the center column low when possible. Avoid placing the tripod in strong wind or on surfaces that may shift. You can also use a center-column hook to hang a suitable weight, making sure it doesn't swing.
What Is the Best Tripod Height for Night Photography?
There isn't one ideal height for every situation. A taller tripod can help when photographing city skylines or shooting over obstacles, while a lower setup works well for foreground details and creative landscape compositions. Choose a tripod with an adjustable height range that suits the locations and subjects you photograph.